Customize campaign click tracking and hosted content domains
What is a CNAME?
The official definition of a CNAME is Canonical Name. A CNAME is a record that is used in the Domain Name System (DNS) to create an alias from one domain name to another domain name.
In the email industry, CNAME records can be used to customize standard domains that are used to track email links, form submissions, and more. This practice can also be referred to as "custom tracking domains", "branded URLs", or "custom subdomains".
When CNAMEs are configured, any reference to a standard tracking domain will be masked. This means when links in an email are clicked, or a hosted landing page is viewed, or a hosted form is viewed, the customer will see their configured subdomains instead of ours.
Example
You may have noticed that when you view the online version of a sent email, or visit a hosted form or landing page, that the browser address bar contains a non-descriptive URL (seen below).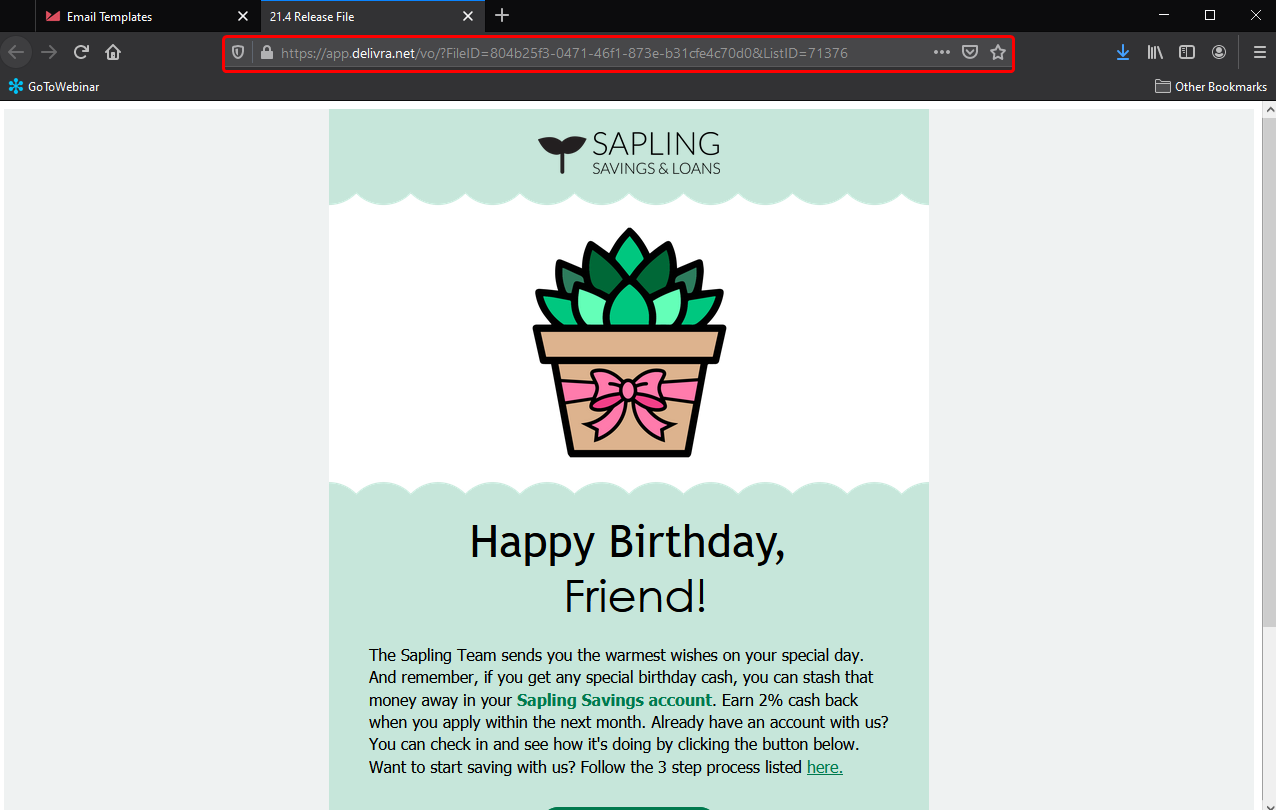
This is a standard URL generated through multiple merged parameters to identify your account, content file, etc. If you prefer to control the domain seen in these instances, we offer the ability to create branded URLs in your account.
Benefits of using CNAMEs
CNAMEs help preserve your sender reputation, increase deliverability, and can even improve email click-through rates.
If you're not using CNAMEs, you’re using a shared tracking domain. Typically this is not a major concern as most ESPs keep shared tracking domains clean and reputable, but it only takes one spam campaign using a standard tracking domain to cause temporary deliverability issues.
Further, using a CNAME that includes your brand name will allow your subscribers to feel confident about clicking links in your emails. Because of this, our customers typically see an uplift in their email click activity.
Where can I add CNAMES?
How-To
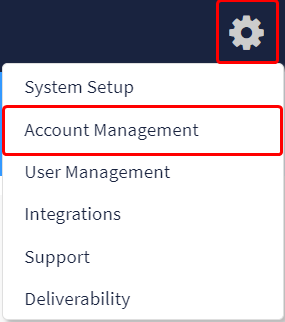
- Click the Settings icon and select "Account Management" from the menu.
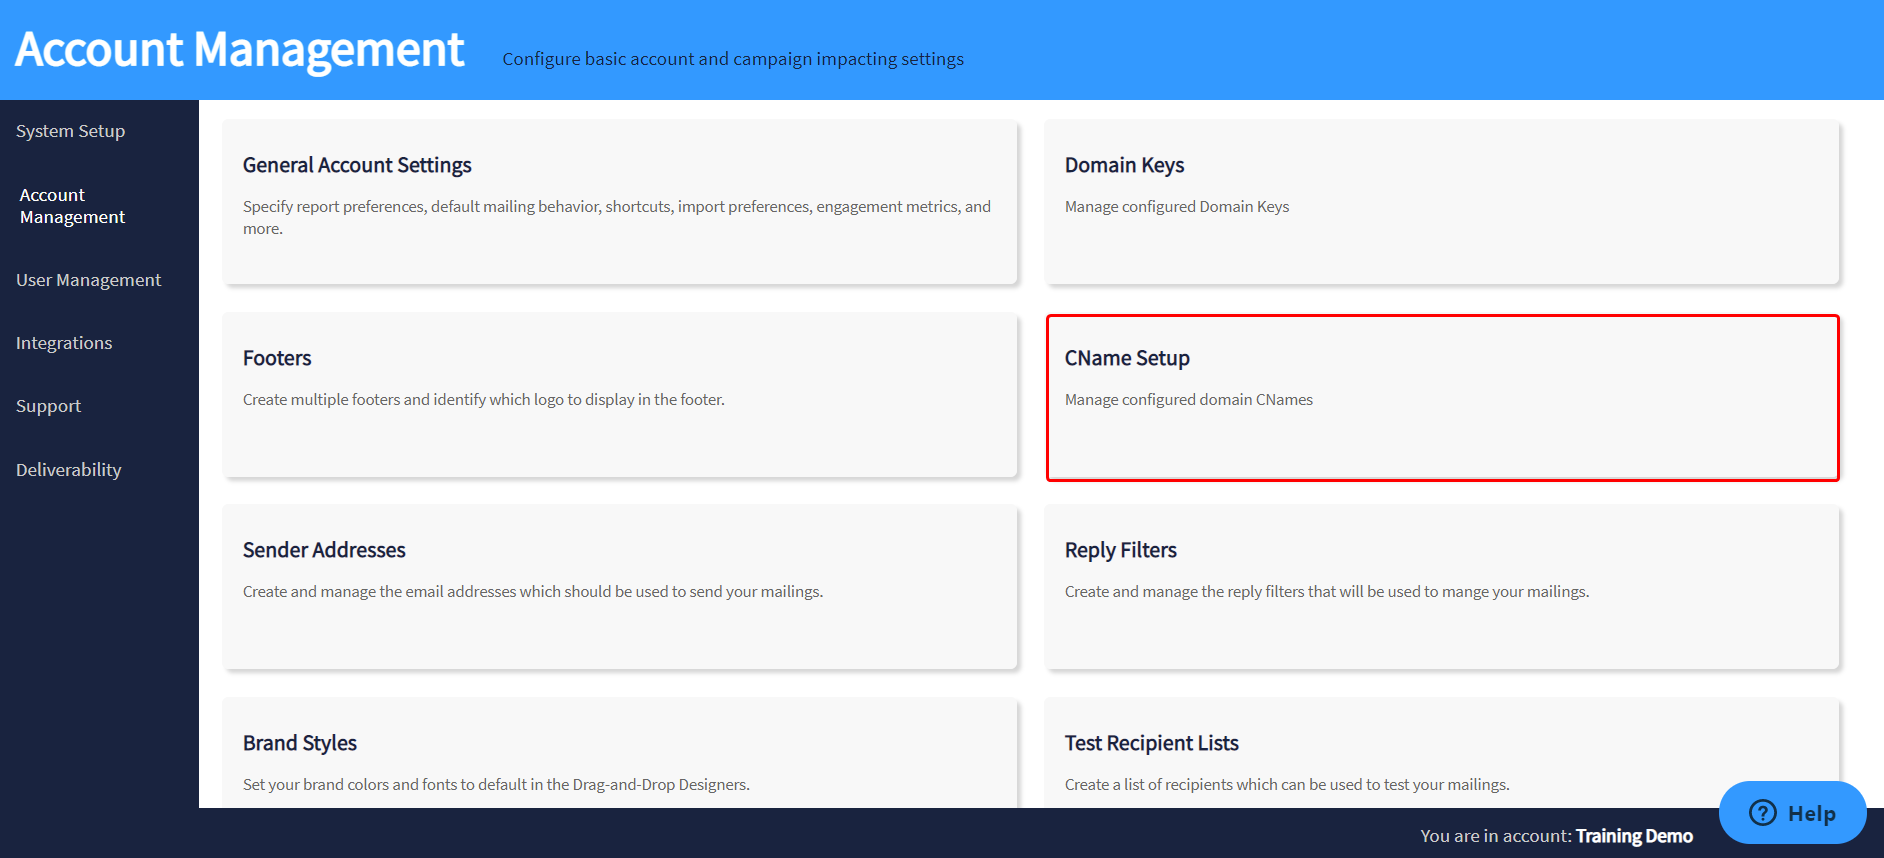
- Then, click the "CName Setup" tile.
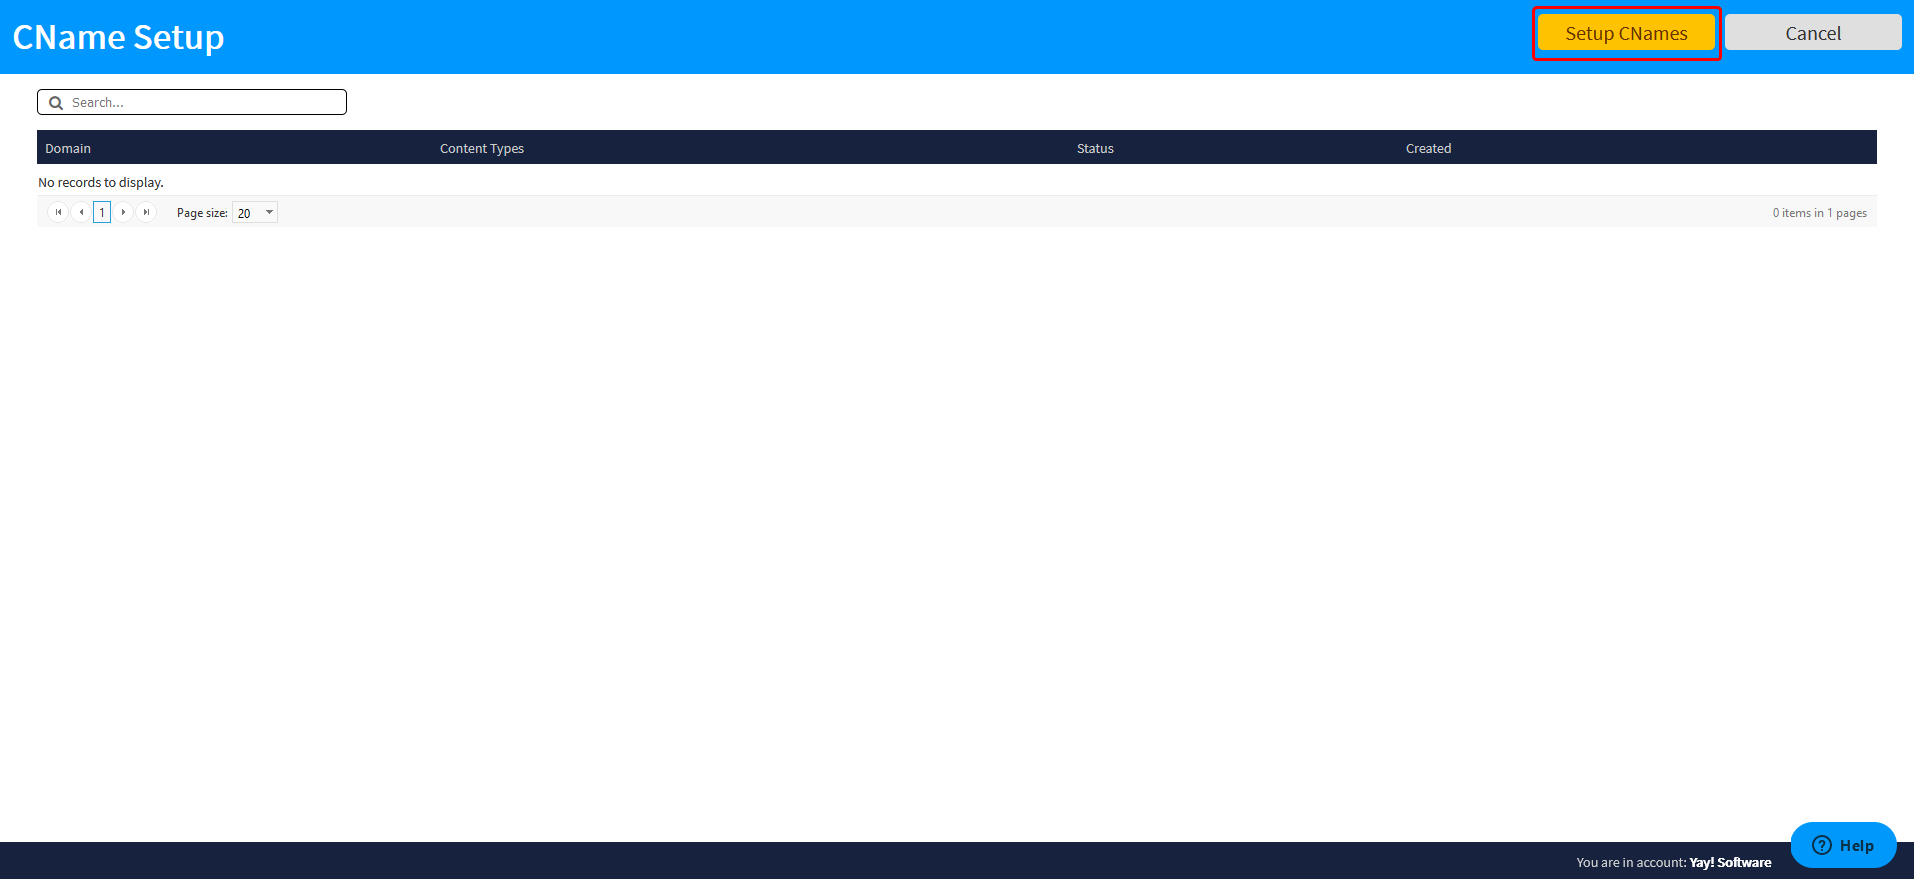
- Choose if the CNAME applies to the account or to all accounts on the site.

- Click the "Setup CNames" button, top right of page.
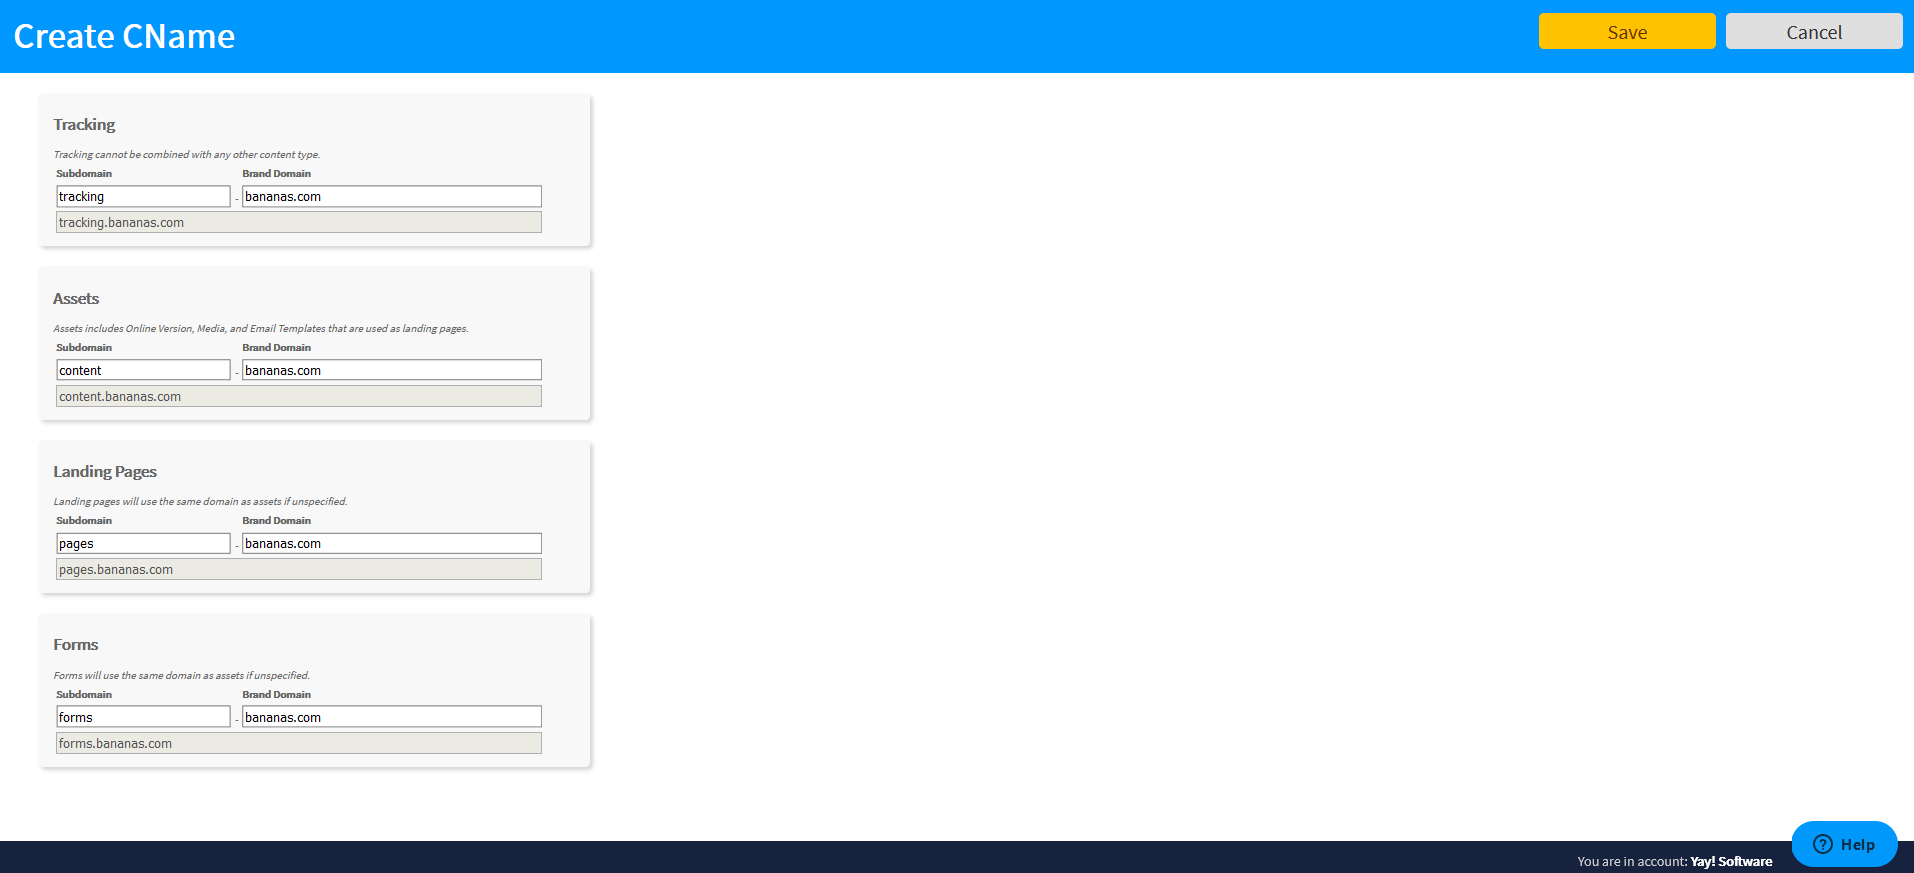
- For each section, enter desired subdomain and brand domain to be used. You may configure up to 4 customized domains for each type: tracking, assets, landing pages, forms. Click the "Save" button, top right of page.
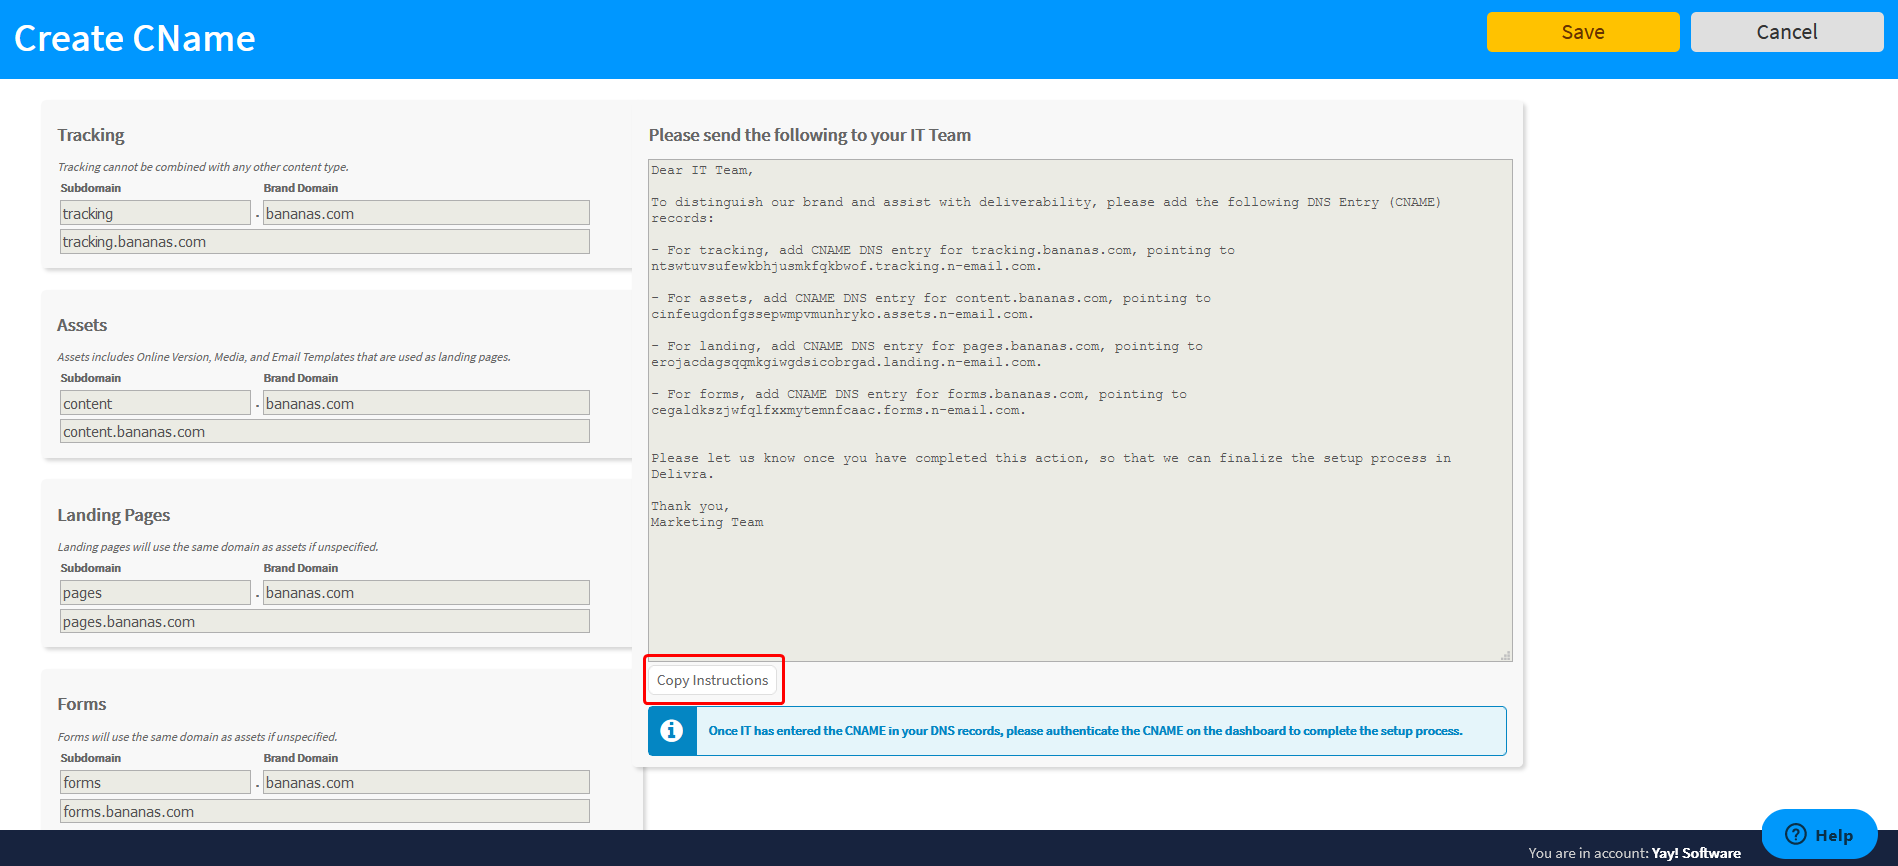
- After "Save" is clicked, IT instruction are generated. These steps must be completed in the DNS records of your domain. Use the "Copy Instructions" button and share instructions with team. You cannot move forward until these steps have been completed. Click "Cancel" to close page at this point.
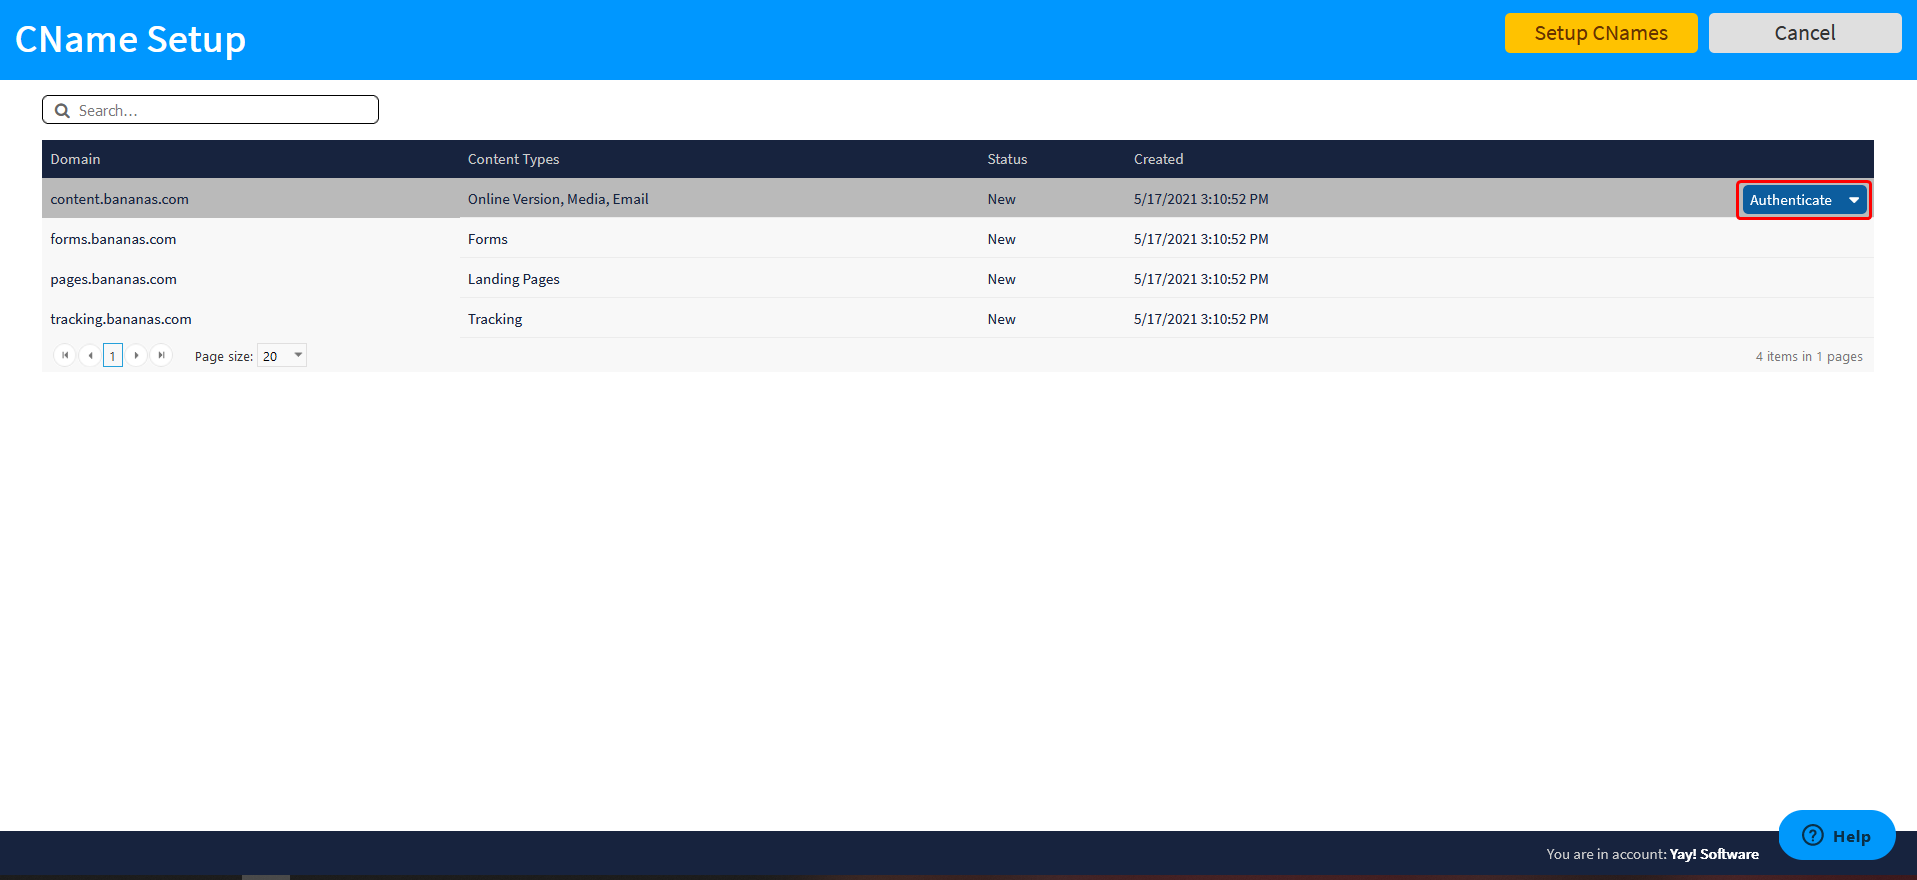
- Once there is verification from your IT team, return to CName Setup in your account to Authenticate the new subdomains. Each subdomain entered will have a separate “Authenticate” button. When clicked, Delivra makes a call to your domain's DNS to check & verify records.
- If the DNS is missing part of a record or a record does not yet exist, a failure will be displayed. Consult your IT team when this occurs to verify the provided instructions were completed.
Notes
- CNAME is available to the Professional license and above.
- Access to CNAME set up is available to site administrators.
- CNAMEs can be setup at the individual account level, or at the site level (for all accounts).
- Setting up CNAMEs is not required in order to properly track and record link clicks. However, setting up CNAMEs is recommended to improve brand consistency and email deliverability.
- If you make a mistake, CNAMEs can be deleted if they have not yet been authenticated. See the drop-down menu on the CNAME Setup listing. If the CNAME has been authenticated, the process to remove it will require billable development time.
- While authentication is in progress, the ‘Authentication in progress’ message will be displayed. Authentication can take up to 5 minutes. If it fails, an ‘Unauthenticated’ message will appear in red. Contact your IT team in the event of an Authentication error. It means that the domain(s) provided in the generated instructions are either incomplete or do not exist.
Related Articles
Manage brand colors & custom web fonts
Save colors & fonts to your account(s) so that users can easily access your brand styles when designing your emails. Brand colors & fonts configured to your account are available in any drag-and-drop designer in the system. Add your brand colors Tip: ...Manage general account settings
General account settings apply to your entire account and these settings include your account's time zone, default segment selection for campaigns, a global reply-to setting for campaigns, and more. To get there, click the Settings icon in your ...Manage Contact Data Fields
Your account includes 90 standard contact demographic fields that are customizable. You can re-name the fields in your account to reflect standard demographic names your company uses. This customization is called a field alias. The field alias name ...Manage sender addresses
A Sender Address is the From line used for the campaigns you send from your account. You can manage your sender addresses in Settings > Account > Sender Addresses. Create a sender address for your account Tip: Open images in a new browser window for ...Manage footers
Footers are automatically appended to the bottom of each outgoing campaign. Their purpose is to identify the sender of the email and provide opt-out options. All accounts are created with a default footer that includes: Sender's company name Physical ...