How do I setup default mapping for imported CSV files?
The Import Files and Field Mappings feature allows you to set rules for how your contact’s data files are imported into your account. Setting up an Import File will simplify your upload process if you plan to use the same CSV file format to add or update contacts on a regular basis. When importing a file into your account our system will match up the name of the CSV file to any Import Name’s that you have created and use the field mappings and import rules you have already defined. Below we will walk through the steps to save field mappings to your account.
How-To
Create a New Field Mapping
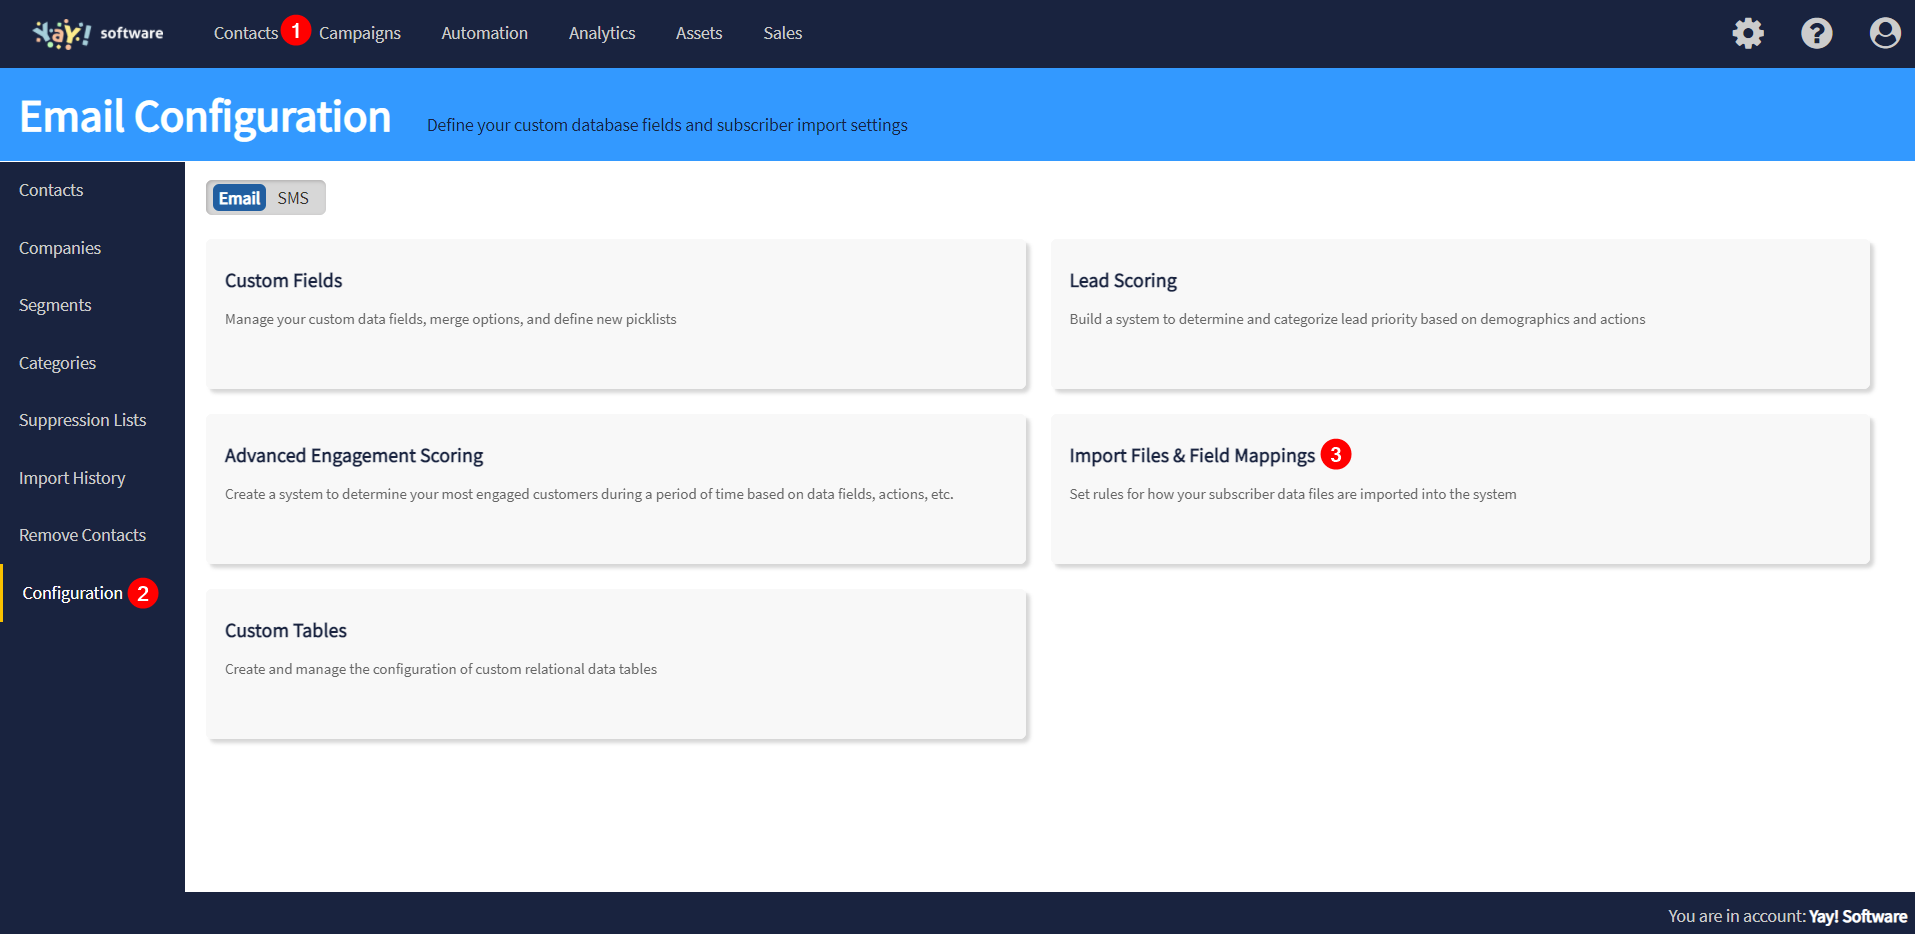
1. Navigate to the Contacts dashboard.
2. On the left menu click on 'Configuration'.
3. Click on the 'Import Files & Field Mappings' tile.
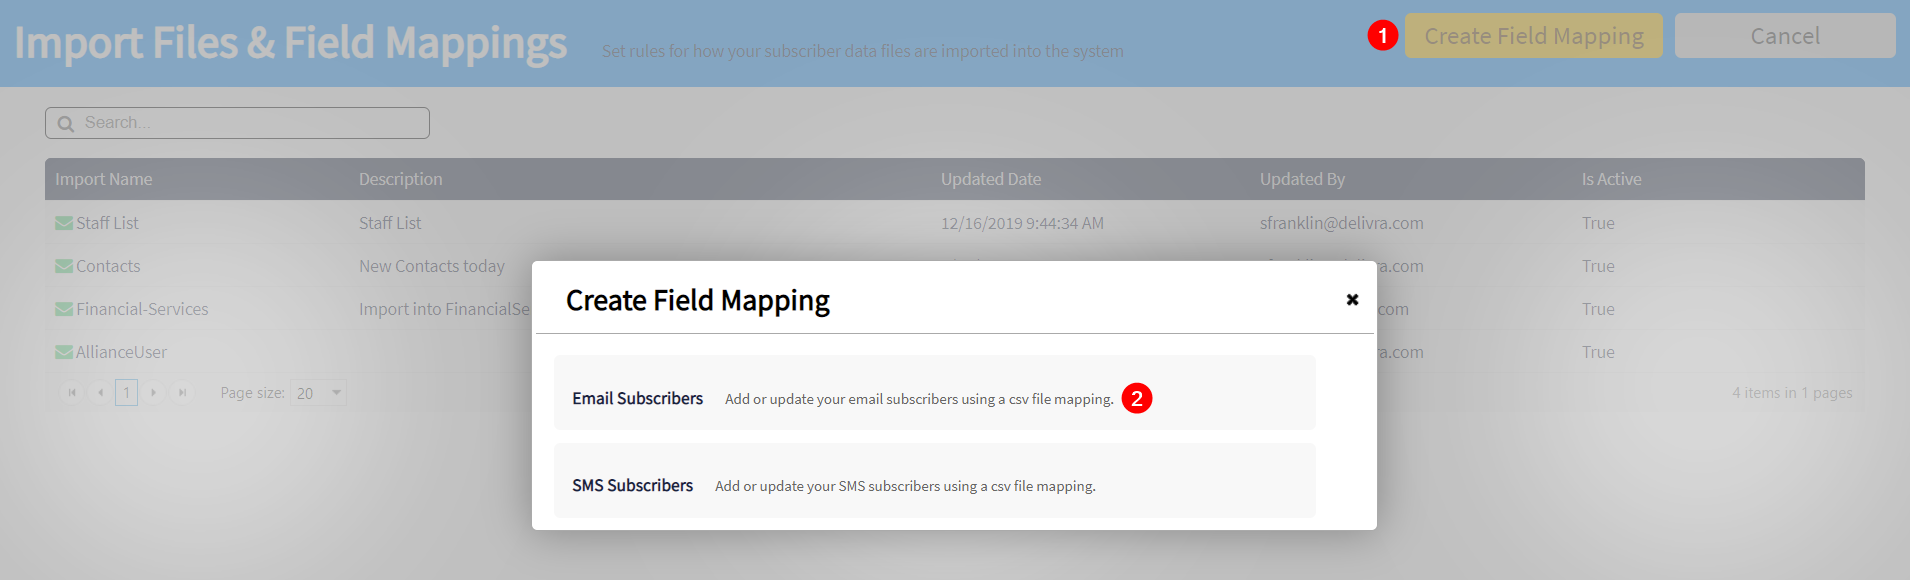
4. Click the ‘Create Field Mapping’ button.
5. Choose whether you would like to set up your field mappings and import rules for Email or SMS imports.
6. Select a file to upload. Clicking 'Select' will take you to your computer's desktop.
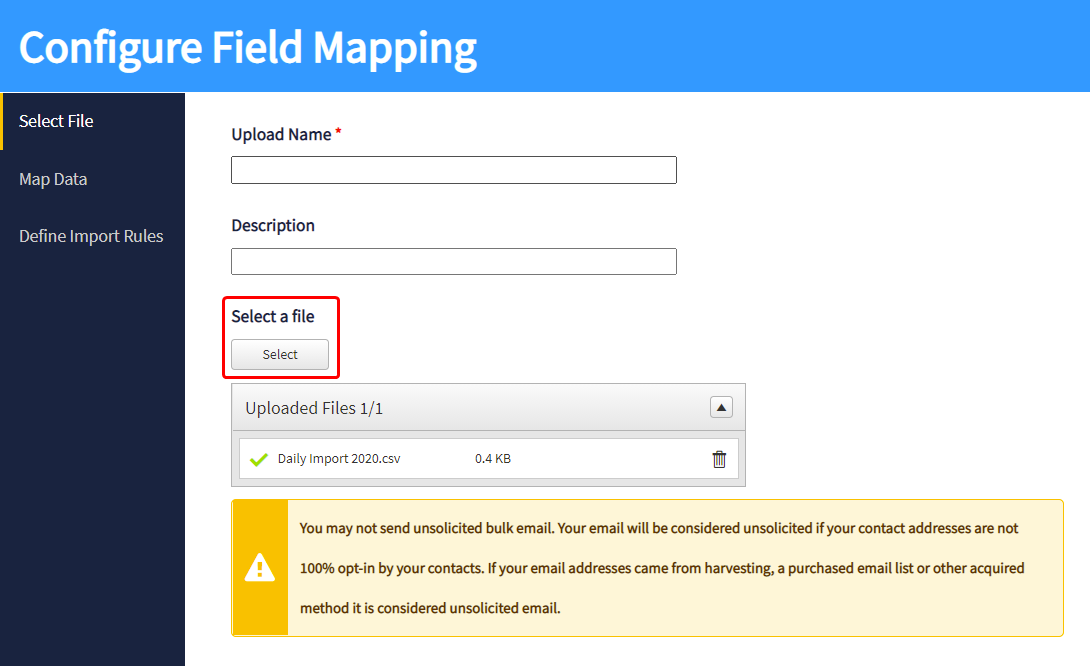
7. Choose an Upload Name that matches the name of your CSV file. This name will be used by the system to match the names of CSV files being imported going forward.
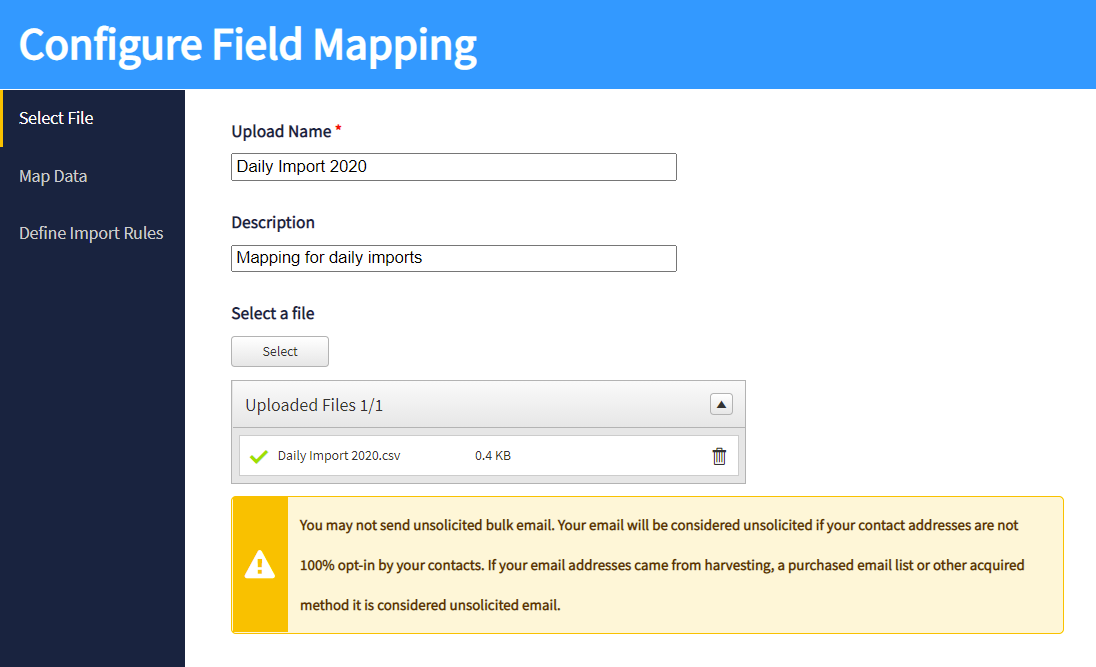
Example: Upload Name of import file to be mapped is ‘Daily Import’ and CSV file name is ‘Daily Import 2020’.
8. Click the 'Next' button. In the next step you will map the data columns to fields in your account.
9. The ‘Update existing contact records’ checkbox should be left checked unless there is a need to only import new email addresses to the system. If unchecked, emails in the CSV that already exist will be skipped in processing. (See image in step 11)
10. Map the columns from the uploaded CSV to the desired fields in your account. On the left are the column headers from the CSV, on the right are the menus to choose the appropriate fields in your account. Any row left unmapped will be ignored by the importer. (See image in step 11)
11. The ’Update’ checkbox next to each row should be checked unless there is a need to ignore the data for contacts that already exist.

12. Click the 'Next' button. In the next step you will define additional processing rules for imports.
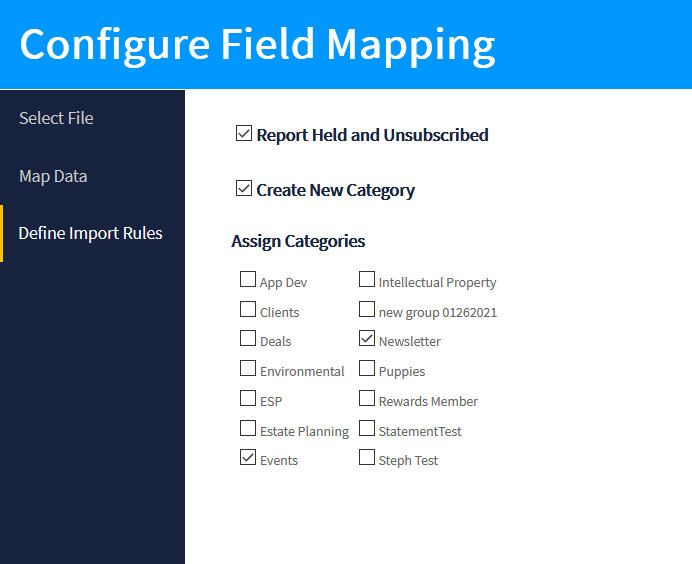
13. The 'Report held and Unsubscribed' checkbox, when marked, will collect and report information to you about any email addresses in the CSV that already exist in your account in these status. The importer will not change the emails in Held or Unsubscribed back to Normal status. (See image in Step 15)
14. The ‘Create New Category’ checkbox will add all contacts uploaded in the CSV file to a new Category every time a file that matches these import rules.
15. In the ‘Assign Categories’ section you can select existing Categories that the uploaded CSV to add contacts to.
16. Click 'Save' button when done to save all of the settings for future CSV imports.
Notes
Use can use this process to map FTP files too. If you do not have a FTP directory set up, please send in a request to your Client Success Manager at: success@delivra.com.
Related Articles
I imported my CSV into the wrong account, what can I do?
DESCRIPTION This article is meant for multi-account users who mistakenly imported a CSV of new or updated contacts into the wrong account. If you find you've mistakenly imported a CSV file into the wrong list, please contact Delivra Support ...Import your contact lists
Preparing your file Before we cover the process, let's talk about file preparation. The following are a few tips for a smooth import experience. Utilize a spreadsheet application to easily view and edit your data file. Organize each point of data ...Managing your Email and SMS contacts
The Contacts dashboard is your central hub for managing subscriber records in Delivra. Here, you can view, import, and update your contacts across two distinct communication channels: Email and SMS. These contact types are stored and managed ...Adding Contacts to Categories
This article details how to add contacts to an existing tag. If you have more than a handful of contacts to add, we recommend you create a spreadsheet to import. After the spreadsheet is saved as a CSV, follow the steps below. How-To Navigate to your ...Why hasn't my contacts counter changed even after I imported new contacts?
It takes around 24 hours for the counter at the top of the Contacts dashboard to update. If you want to make sure your contacts were added properly, you can: Check your Contact Import Status under Import History (if you imported a CSV). Scroll to the ...